Halloween Photo Contest
Halloween Photo Contest was a spook-tacular promotional from FujiFilm. No purchase was necessary, there were daily giveaways, and prizes for the actual contest, this free promotional was available to anyone with a phone or camera.
Content is from the site's 2011 - 2013 archived pages.


Your fun, cute or scary Halloween photos could win you a trip to Hersheypark in the Dark 2013, a New York Institute of Photography course on the Fundamentals of Digital Photography, a FUJIFILM FinePix HS25EXR Camera, a large Wall Canvas from the Rite Aid Picture Center, a Pinnacle collage frame, or Rite Aid gifts cards worth as much as $250. There are LOTS of prizes! See Contest & Prizes for a complete list of prizes.


The winning photographer will win a spooktacular trip for 4 to Hershey, PA to experience all of the frightfully fun rides and attractions at Hersheypark in the Dark. Enjoy 11 thrilling roller coasters, over 20 rides just for kids, award winning entertainment, and of course, lots of delicious chocolate. The grand prize includes:
- Round–trip coach airfare from the nearest airport to Harrisburg International Airport in Harrisburg, PA
- Round trip transportation from HIA to The Hershey Lodge
- 2 nights accommodations at The Hershey Lodge
- 4 two-day passes to Hershey Park in the Dark
- 4 passes to Create Your Own Candy Bar at Hershey's Chocolate World
- 4 passes to The Hershey Trolley Works Tour
- $300 in Chocolate Currency, to be used as cash at most Hershey Entertainment properties
- 1 FUJIFILM FinePix HS25EXR Camera
- 1 Rite-Aid photo book

Approximate retail value of the Grand Prize is $3,900. Actual value may vary depending upon timing and departure city.
* If the Grand Prize winner is unable to attend during the 2013 Hersheypark in the Dark operating season, alternate arrangements may be made based upon availability.
See official rules for more information.
![]()
1st Prize: Short Course on the Fundamentals of Digital Photography, a FUJIFILM digital camera, a $250 Rite Aid gift card and more!
The first prize winner in each category wins a FUJIFILM FinePix HS25EXR Camera, a New York Institute of Photography (NYIP) home study Short Course on the Fundamentals of Digital Photography, a $250 Rite Aid gift card, 16" x 20" Wall Canvas from the Rite Aid Picture Center, two (2) one-day admission passes to Hersheypark, valid during the 2013 Hersheypark in the Dark season and an enticing Hershey chocolate gift basket.
NYIP Short Course
The NYIP course includes 16 full-color printed lessons, Audio CD Lesson Guides, Photo Workshop DVD Guide, Monthly Website Updates, personal Student Advisor, Audio Photo Analysis and a Graduation Certificate. The New York Institute of Photography is the world's oldest and largest photography school. Established in 1910, NYI has grown to become the premier provider of distance learning in photography, educating more than 20,000 students in the US and more than 50 countries abroad at any given time. Visit www.nyip.com for more information. Course must be completed by 12/31/13.

The first prize winner in each category also wins a FUJIFILM Finepix HS25EXR Digital Camera, $250 Rite Aid Gift Card, 16" x 20" Wall Canvas from the Rite Aid Picture Center, two (2) one-day passes to Hershey Park, valid during the 2013 Hersheypark in the Dark season and a Hershey chocolate gift basket.
 |
 |
| FUJIFILM FinePix HS25EXR Digital Camera The HS25EXR offers versatility and optical quality to those photographers who don't want the lens-changing capability of a DSLR, but still want total control over their images. Equipped with advanced features and a high performance 16MP EXR CMOS sensor, a 3" LCD display, a whopping 30X optical zoom lens, 1080P Full HD Movie Mode, AA battery operation, and a host of consumer friendly automatic settings, the HS25EXR is ready for anything - from the simplest full-auto photo capture to the most advanced applications. |
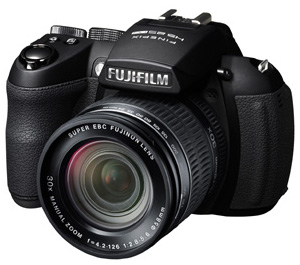 New FUJIFILM FinePix HS25EXR digital camera. |
2nd Prize: FUJIFILM Finepix XP170 Digital Camera - Orange, $150 Rite Aid gift card, 16" x 20" Wall Canvas from the Rite Aid Picture Center, and a Hershey chocolate gift basket
The second prize winner in each category receives an exciting combination of prizes including a cool, new FUJIFILM XP170 Camera.
| FUJIFILM Finepix XP170 Digital Camera The FinePix XP170 features a Wireless Image Transfer function that connects to Android™ and iPhone®/iPad® devices for transferring images to your phone and uploading to social networking sites soon after the picture is taken. The FinePix XP170 also offers extreme photo taking capabilities just like other XP-series models, including underwater shooting to depths to 32.8 feet, cold weather operation to 14°F, plus shock-proof from up to 6.6" and dust-proof operation. Couple all of this capability with a 14.4 Megapixel CMOS image sensor, a 5X zoom, an extra bright LCD display, and high def movie capture for an exceptional performing camera designed to capture great photos in the most extreme conditions. |
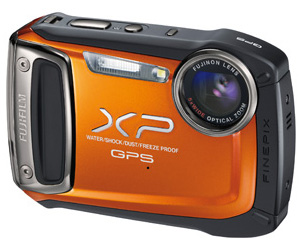 New FUJIFILM Finepix XP170 digital camera |
The 2nd prize winner also receives a $150 Rite Aid gift card, a 16" x 20" Wall Canvas from the Rite Aid Picture Center and a scrumptious Hershey chocolate gift basket.
|
|
3rd Prize: $100 Rite Aid gift card, Pinnacle 11" x 22" frame with photo mat, 16" x 20" Wall Canvas from the Rite Aid Picture Center, Polaroid iF045 Dual Screen Waterproof Camera and a Hershey chocolate gift basket.
The third prize winner in each category receives an exciting combination of prizes including a waterproof camera.
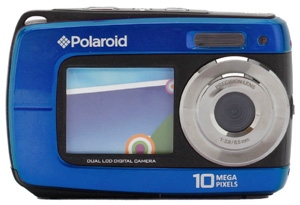
Polaroid iF045 Waterproof Camera
Polaroid iF045 Waterproof Camera
The perfect Camera for taking pictures just about anywhere! Polaroid iF045 give you an amazing combination of beautiful image clarity, ease of use, and extreme durability, which together with Polaroid's crystal clear dual screen layout, you have the ultimate camera for everyday events, no matter where the world takes you. With its ultra unique design of features which include being waterproof, shockproof, dustproof, sand proof, and freeze proof, you can take you iF045 just about anywhere and not have to worry about it.
PINNACLE FRAME
The 3rd prize winner also receives a 11" x 22" "Family" sentiments 3 picture insert collage frame with black finish so you can display your best shots!
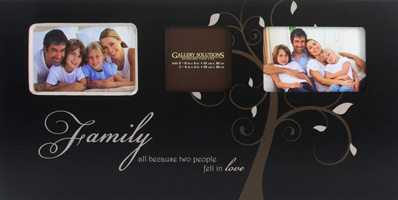
Pinnacle frame with custom mat
The third prize winner also receives $100 Rite Aid gift card, a 16" x 20" Wall Canvas from the Rite Aid Picture Center and a luscious Hershey chocolate gift basket.
|
|
![]()
![]()
Halloween has its own special magic and Rite Aid would like to make it even more fang-tastic with these extraordinary special offers.

All treats, no tricks. Order today!
Remember there's always free shipping when you order in-store at Rite Aid or at Rite Aid's online photo center and pick up in store.
If you are not a member of the Rite Aid My Way Photo Center, becoming a member is free...and easy. Just complete the membership form. Then, upload your images and select the photo products you would like to order. Place your order and pick it up at your favorite local Rite Aid store. Please note that photo product items like the poster or magic mug take a few days to manufacture and deliver to the store.
Note: Promo code must be entered at time of check-out to apply discount. Limit one promo code discount per order. Additional discounts cannot be applied. Offer valid thru November 10, 2012.
~~~~~
AS ASIDE: I was in my local Rite Aid store looking for over-the-counter reading glasses when I saw the promos fpr the Halloween Picture Contest. I loved dressing up for Halloween as a kid. My mother would ask what we wanted to be for Halloween and then she would make us costumes. As an adult with my own kids I have continued the tradition. Piece of cake I thought. We always take lots of pics at all the holidays. Great memories to share with the family. I was already a member of the Rite Aid My Way Photo Center. But first I needed to find a pair of reading glasses. Looking at fine print was getting more difficult, but I didn't think I was ready for prescription glasses. Opps. Big mistake. The over-the-counter reading glasses made me dizzy and gave me a headache. Off to the eye doctor for a prescription. I then decided to buy glasses online. My sister uses a site called Eyeglasses.com to buy frames along with her prescription lenses. She promised to come over and walk me through the process once I had selected a pair of eyeglass frames that I liked. A week later I had my new reading glasses. What a difference they made while I was sewing the kids' Halloween costumes. I should have gottan them a whole lot sooner. We didn't win the big prizes with my Halloween pictures but I did take advantage of the and had the kids pics put on refrigerator magnets using the promo code: SPOOKTACULAR.
~~~~~
About the Judges

The world's largest imaging publication, Popular Photography combines expert yet easy-to-follow advice, stunning images, and rigorous product tests and analysis to give photographers at every level of experience all the tools, techniques, and inspiration they need to make great pictures.
This year's contest will be judged by the editors of the magazine.
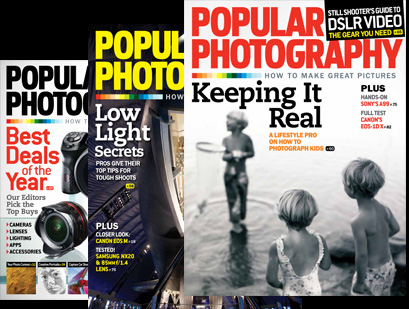
Subscribe to POPULAR PHOTOGRAPHY magazine and take great pictures every holiday season!
Printing your pictures is spooktacularly simple at Rite Aid... to find a store near you.
 I have a great photo... what should I do?
What's really terrific about photography today is that there are so many ways to use a great photo. Obviously, you can display the photo on your camera or smartphone, post it at Facebook, share it on group photo sites, or send it via email — and you can print it to keep it, display it or give it as a hard copy. But did you know that there are lots of new ways to publish your photos?
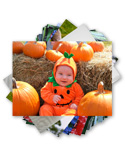
BIG prints... Posters and Collages

Did you know that you can create large posters and collages with your images easily at Rite Aid? This collage from Rite Aid captures lots of happy memories from the summer. You can design your own collage at the Rite Aid kiosk or online photo site/images, or simply choose the autofill feature and your collage will be created automatically in seconds! If a picture is worth a thousand words, imagine the story that a collage can tell! Tell your story in 11x14", 16x20", or 20x30".
Photo Books

And speaking of stories... photo books are a wonderful way to publish your memories. Imagine giving a gift today that will be even more valuable in ten years! Friends and family are thrilled when you create a photo book for them; they're simply amazed that you care enough to publish a hardcover book with pictures of them and the good times you've shared. Rite Aid makes it easy with a pre-populate feature that creates your book automatically if you like, and then lets you edit it until it's just the way you want it. There are also lots of beautiful page designs to choose from. Give the gift that grows in value!
Calendars
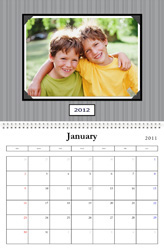
Another fun way to share photos and memories is with a 12-month calendar. Each month, a new photo is the star! Once again, the pre-populate feature on the Rite Aid website can help you create the calendar quickly, if you like. But you are always in control and can choose the perfect image for each month. Give the gift they'll treasure all year long.
Photo Gifts

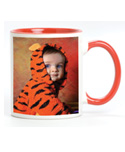
Sometimes a printed picture is not enough; you want something surprising, fun and personalized! Rite Aid has a HUGE selection of photo gifts that you can personalize with your own photo — from mugs and mousepads to kitchen trivets to wall clocks and more. Check out our full selection at www.riteaid.com/photo.
How do I print my digital pictures?
 You can print your pictures at home, but many consumers have learned that ordering prints online at Rite Aid My Photos My Way or at a Rite Aid store is the best way to get digital prints.
Many photographers appreciate the convenience, cost-savings and predictable high quality of prints made by Rite Aid's professional photofinishers. Click here to find a Rite Aid photo center near you.
You can also place your order online at Rite Aid My Photos My Way and pick them up in most Rite Aid store locations in as little as an hour. For even greater cost savings, you can order your prints and pick them up a few days later.
![]()
How do I get more information about digital picture-taking and printing?
Visit the New York Institute of Photography website which has great articles on its Photo eZine web pages. There, you can also sign up for the NYIP newsletter, filled with helpful photo tips and opportunities to enter more exciting contests.
The PMDA site, www.TakeGreatPictures.com, is filled with great tips, celebrity photos and information on other contests.
Don't own a digital camera?
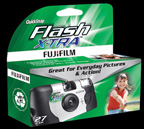
 Don't miss costumed kids scooting around at warp speed or the sudden grin when a trick-or-treater gets a favorite treat placed in their Halloween sack. Capture all of the fun and excitement of Halloween with a FUJIFILM QuickSnap Flash X-TRA™ 800 One-Time-Use Camera available at Rite Aid.
The QuickSnap Flash X-TRA™ 800 is pre-loaded with Superia X-TRA 800 speed film and has a flash range up to 14 feet. They're easy to use and a great way to introduce kids to photography.
Capture the memories of your ghosts, goblins, pirates and princesses indoors or out at any event including costume parties, home decorating, costume shopping, costume making, pumpkin carving, parades and trick or treating!
 Make the most of your Halloween memories with Rite Aid and FUJIFILM. Why not give everyone in the family a camera to capture all of Halloween's special memories from every point of view?
Happy Halloween! Give everyone a treat by printing your pictures or making a special gift!

Want to learn how to take better pictures? Try these eerily-effective tips from the photo experts at the New York Institute of Photography, the world's largest and oldest school of photography.
How To Take The Most Boo-tiful Halloween Photos
Halloween offers amateur photographers lots of treats for taking great photos, but bagging the really super shots requires a few tricks. Fortunately, the wizards at The New York Institute of Photography have some magical suggestions for Halloween Photo
• Framing that Halloween scene
• Taking pictures at dusk and at night
• Getting the glow of a jack o’lantern
• Making trick-or-treaters the stars of your shot
• Capturing the spirit of Halloween
And much more! With just a little extra know-how, your shots could be spellbinding. Whooooo knows, it could even help you win the Fujifilm Picture Perfect Halloween Photo Contest!
How to Take Great Halloween Photographs
Halloween Editor's Note
Since Halloween is a holiday that presents terrific photo possibilities, it's no surprise that "How to Take Great Halloween Photographs" is one of our most popular "How To" features. If you read this article, we promise you'll take better photos of the goblins and ghouls that you meet on All Hallows Eve. If you have read it in the past, why not review it as a brush up? After all, like Christmas, Halloween comes but once a year! If you see a ghost, don't forget to say "Boo!"
How to Take Great Pictures With Your Camera Phone
By Chuck DeLaney and the NYI Digital Photography Team
It took traditional cameras almost 100 years to evolve into handy tools that everyone could use, and it took digital cameras about 10 years to complete the same cycle. We've seen camera phones reach that same level of utility in just a few years.
For many people, their camera phone is their digital camera. With recent models that feature 3-, 5-, even 8-megapixel size files, the photos can be very good. Consider celebrities, now they’re photographed whenever and wherever they appear in public. Even if the paparazzi photographers don’t get tipped off, everyone has a camera, and the photos taken by the man in the street can be good enough for magazines and agencies that feature celebrity photos. CNN's iReport, for example, depends on citizens armed will cell phone cameras (and video).
Plus, taking photos with a camera phone makes it quick and easy to send photos to other phones, download them into your computer and – perhaps most important of all for teenagers and twenty-somethings - quickly upload your photos to Facebook and other sharing sites.
While there are some limits to the lens and flash capability of camera phones, they are getting better all the time. Phone manufacturers, spurred by the success of the Apple iPhone, keep adding features to phones that are getting smarter all the time.
The camera phone is a special tool with many benefits and some limitations. I could fill dozens of pages with Tips for Great Camera Phone Pictures, but I know your time is limited. Feel free to read as many of ten tips below as you wish. One thing I can promise is that the more you read, the better you'll improve your chances to win the "Picture Perfect Halloween" Photo Contest.
1. Sharp picture, steady camera.
There's a reason those hard-charging detectives in "real-life" police dramas use two hands to steady their handgun. When you're holding something at arm's length, steadiness can be a problem. With any camera, camera shake can be a big problem, and ruin pictures. When you use a camera phone, you have to hold it far enough from your head that you can see the image on the LCD panel. Try holding the phone with both arms. When you're ready to take the picture, press the shutter release gently, don't punch it. Many photographers either let their breath out, or take a breath in, steadying themselves before pressing the shutter. In low light, use the flash on your camera phone if it has one.
2. Technical stuff – focus, exposure and lighting.
Focus and exposure are automated on a camera phone. You should give the camera's sensors a few seconds to adjust to the light level and focus on the subject in the center of the frame before you take the picture.
Lighting is very important with camera phones. They work best in bright light and can be a problem in low light situations. Some camera phones have a low light setting or allow you to boost the brightness a bit. Bright flat lighting, such as open shade or an overcast day, will produce the best detail in your pictures.
3. Those Three NYI Guidelines
When you look at the scene in your viewfinder, ask yourself three little questions: What is the subject of my picture? How can I emphasize the subject? How can I simplify the picture? It works every time. Often the solution is to advance on your subject. Remember that your camera phone can probably focus on relatively close-up subjects. As a veteran war photographer used to say, "If the picture's not working, get closer."
4. Camera angle – up, down, or sideways.
Far too many photos are taken from about five feet above the ground with the camera pointed straight ahead. Experiment. For scary Halloween subjects – including all those costume categories - you might be better shooting from a low angle to make the monster looming over you all the more towering. However, and this is important: Don't do this outdoors if that will put the bright sky behind your subject in the photo because that's likely to affect your exposure and turn the monster into an outline. On the other hand, there are some costumes that might be very scary in silhouette.
With little kids in costume, make sure you get down to their level. Most of the time pointing the camera downward belittles your subject.
5. Lighting – again!
Lighting is so important it deserves another tip. Flat lighting gives good detail in both the light and dark areas in your subject, but with camera phones and other digital cameras you can take pictures, review them, erase the results if they don't meet expectations, and then shoot again. That means you should experiment. Try odd lighting to give a spooky Halloween effect. Shine a flashlight up on the face from below – so-called "ghoul lighting." Put that creature of the night in darkness and then illuminate the vampire with the headlights of a car, or put your werewolf next to a big bonfire – just don't singe the fellow's fur – he won't like that!
6. Resolution and Picture Quality.
The bigger the better. Choose "best," "highest," or "fine," for optimum resolution and quality.
That means to make sure you deliver the most detailed images to this contest, take all possible contest photos using the picture-quality settings that give the best results possible with your camera phone. When in doubt, spend a few minutes with the instruction manual that came with your camera phone. You won't regret it.
First, under "Resolution," pick "best" or "highest." This means you'll capture the maximum number of pixels possible with your camera. Without getting into the specifics, just understand that more resolution means more detail in your photo.
If your camera phone has a "Quality" setting, pick "Fine" or "Best," or whatever other word is used to denote the top quality. This will govern the way your picture is stored in the JPEG format. Again, we're going to duck the specifics.
By using the best settings in these two areas, you'll limit the number of pictures your camera can capture. Many users want large capacity for photos in their phone so they use low quality settings. That's fine if you're intending to use the photos you take only for e-mail or telephone screensavers or caller ID photos, but not for this contest. Some phones offer the option of adding a separate memory card. It's not a big investment, and perhaps you even received such a card when you purchased your phone. Use it.
If you don't have a separate memory card, to make sure you have a picture that will look great in the winner's circle, you'll have to learn how to move those photos off your phone and save them as prints or in folders on your camera phone or upload them to a service. That way you can keep shooting in high resolution.
7. Forget the frames and special effects.
These can be cute for LCD display, but they don't add to the image content in a contest. Using these will just diminish the area you have available for your picture, so avoid them.
8. Color effects and color balance settings can be important.
While many colorful costumes call out for full-color photos, some demons and skeletons actually look spookier in black-and-white or some even more ghoulish monochromatic scheme. For example, my camera phone allows the user to choose normal color as well as black-and-white, sepia (brownish), and negative. The latter can be very scary since it makes your tongue blue-green. Sepia looks somewhat historic and might be good for old-time ghouls, and black-and-white is naturally great for ghosts.
Ghoul in original color, sepia tone, and eerie green tone.
Color balance is a complicated subject in digital photography. We won't belabor it here, but if your camera phone permits selections other than "automatic," you might find settings such as sunny, cloudy, tungsten, fluorescent, even manual. You can play around with these to either get the best possible color under different lighting conditions, or to try to create strange effects.
9. Review your camera phone pictures on a monitor or as 4"x6" prints before you decide which ones to submit.
One thing photographers learned early on with digital cameras is that the LCD viewfinder is hard to use for photo quality evaluation. This is particularly true for the small LCP panel on most camera phones. Use a service to get your photos onto a computer monitor or get prints made to make sure things really look as good as they appear to be in your camera phone's LCD screen before you enter a photo. That small image can conceal a lot of flaws that you would correct if you could see them clearly. Take a tip from the pros – look at a larger version of your image before you decide.
10. Shoot, shoot, shoot!
Professionals invest time getting the picture "just right." All too often, amateurs don't. We're not talking about taking all day setting up a photo or, like Ansel Adams, waiting all day for the light to be just right. But, if you see that soda can in the monster's hand AFTER you take the picture, carefully and politely remove it and then shoot again. After all, with your camera phone, it doesn't matter how many pictures you take since you can erase all the one's that don't come out just right.
BONUS TIP: Twilight for night time.
This is a powerful trick that pros use. When it's night time out, the sky is black and lacks detail. But at twilight, that rich purple-blue sky gives lots of great light and color to the photo. The viewer will think "night time" every time and you'll have a better picture.
Parting Shot: Mr. Monster, please remove your mask.
If your favorite Monster is wearing a mask as part of his or her costume, take the time to make some pictures of that Phantom without the mask. For the "Picture Perfect Halloween" Contest, you'll want the mask on, but when you look back on these moments years from now, or decide to send some prints to your relatives as a Christmas present, the pictures that show your child's face and not that of Spiderman or Vampira will provide the family memories that give photography a large part of its power.
Remember, if you make the effort to take some really great photos of your family, friends and neighbors this Halloween, you'll be a winner in their eyes regardless of what the judges decide!
Quicksnap photo tips from Fujifilm.
Be sure to capture all of the fun and excitement of Halloween with a FUJIFILM QuickSnap Flash X-TRA™ 800 One-Time-Use Camera available at Rite Aid.
The QuickSnap Flash X-TRA™ 800 is pre-loaded with Superia X-TRA 800 speed film and has a flash range up to 14 feet.
The memories of your ghosts, goblins, pirates and princesses can be captured indoors and out at any event including costume parties, school, parades and trick or treating!
Make the most of your Halloween memories with Rite Aid and FUJIFILM.
Photo Tips:
- Move in close to get the details.
- Photograph fast before your subject starts to fidget.
- Compose with care. All lines should lead to the subject of the picture.
- Be selective about what you let get into the frame.
- Focus your attention on the subject, not the background.
Seven habits of successful pet photographers.
Seven Habits of the Successful Pet Photographer
Whether they're cute or ferocious, you want to immortalize your family pet on film. Don't worry if your Beagle, Siamese, or Iguana is camera shy, these little devils can't escape NYI photographers! We are here to help you with our Seven Habits of the Successful Pet Photographer. So fluff up your Persian and let's get started!
1. Get inside your pet's brain.
For a portrait, you want your four-legged buddy to feel at ease so why not try to contain him or her in their favorite hang out-be it the rocking chair on the front porch, the stoop, on top of the fridge, or on top of your desk. Many cats like to rest on top of reading material, not for the intellectual stimulation, but to prevent their masters from reading so that they can get all the attention.
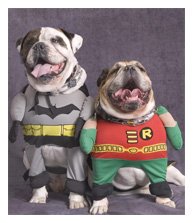
You should always respect your pet's personality when taking a photo just as you would for a human subject. Here's an ethical question for you. Should pet owners resist the urge of draping them in Versace? Does this really humiliate the animal? Well, we should probably leave that for your local pet psychic to answer. Chances are, though, if you dress your Saint Bernard up in red raincoat and booties, you're not going to get a natural expression. We leave this to your discretion. The NYI staff has fallen in love with this photo taken by NYI Student Carolyn Sauer of this poodle in his pink tutu. We suspect that this puppy was begging for treats and oblivious to her ballerina get-up. By the way, take a look at this puppy's feet – in first position of ballet!
2. Thou Shalt Tell A Story.
See this cat behind the screen looking out? We can imagine the story behind this photo. It is a look that cat owners will recognize – that hypnotic stare that a cat gets when it intently studies a feathered object that it would like to nibble on. Next time you see a photo of a pet, see if it tells a story. It doesn't have to be a long story. It can be a short story as in this poodle in the pink tutu. Let's say you're trying to take a photo of your golden retriever and in walks your toddler with an ice cream cone and your golden retriever then knocks the cone out of his hands. The end result will be a photo that speaks for itself!
It's a good idea to have your camera at a central location in your home so you can grab it the second you see an animal story.
3. Be prepared for sudden movement.
Pets can be unpredictable and move without warning. Consider your photo session a jungle safari of sorts and prepare for the cheetah's sudden escape. Sometimes pets can be restless and jump at the sound of a shutter click, so you should adjust your camera accordingly. Set your shutter speed at about 1/125th so your tabby doesn't come across as one big orange fuzz ball. With film use a high speed such as ISO 400 or 800 film if you are going to be photographing indoors with minimal available light.
Pets can be just as vain as their masters. You can make a shiny coat of fur look even better by using a soft light or catching your pet taking a late afternoon sunbath.
4. Control the clutter on the set.
Though you will not have to deal with the model's ill-coordinated clothing, you still don't want to photograph your Dalmatian against a drab shower curtain.
Remember, follow your pet's thought process – eat, sleep, play – in other words – simplify! Once you decide on the location of your photo session, if it is indoors remember to get rid of clutter – stray magic markers, dirty socks, human limbs, TV Guides – things that distract and do not add to the story behind the photo. Outdoors, watch out for lawn furniture, stray toys and other debris that can complicate your background.
This brings us to our fifth Habit.
5. Consider your camera angle.
It's a good idea to place the camera at about the same level of the animal. This will fill your frame with your furry subject. If you're outdoors and your subject is digging for treasures or eating your neighbor's tulips, get down in the dirt so you can be at the same level. Seeing the subject's point of view, can give you an extra creative spark which will lead to better photographs.
If you are aiming for a glamorous close-up shot as in NYI Student Patricia Fielder's photo of her cat, you will want to use a close-up lens and be very quiet so you don't interrupt kitty's trance. Oh, what beautiful fur this cat has! A pet photograph doesn't always do justice to the subject's fur.
6. Don't forget the treats and the props!
Treats are tools of the trade in pet photography. If you know your pet has a weakness for...say carrot cake, liverwurst, or peanut butter, do not be afraid to use these to help you take that unforgettable shot. This can work especially well when photographing people with pets. (Though, you may want to get your vet's approval for the peanut butter.) If you want to have a great portrait of your child and pet, try getting the child and the pet to look in the same direction. Make sure the child is comfortable with the pet and vice versa. The child can cuddle the animal if it is small enough or stroke it if the animal towers over the child. It probably isn't a good idea to have the child play rodeo and ride it around the living room. The trick is to show the relationship between the pet and the person in the picture.
In NYI's Lesson on Child Photography and Pet Photography, we offer this inside tip: If you want two animals to "cuddle," try rubbing some food behind the ear of one of them – then be prepared to shoot fast! If you are shooting a group of puppies or kittens, think about placing them in one place – a basket, sink, tub, or mailbox so you can contain in one area.
Make that tuna frosting, please! As you can see from this cute birthday party photo, props can really help your create a great photo. NYI Student Suzy Maynard of Pennsylvania took this photo. I think the cats were so preoccupied with the food, that they don't seem to be bothered a bit by the silly birthday hats and cat sized cups.
7. Study your pet during the day.
What sets him apart from other animals? What weird habits does he have? If you were to interview one hundred cat owners, they would surely come up with one hundred different activities their cats like to do besides snoozing. Some cats like to wrestle with stuffed animals, chase flies, and lick the spaghetti pot. If you want to take a funny photograph, the key is in the behavior. Aside from their life of luxury (sleeping, chasing ghosts and shadows, and eating), what do they do to entertain themselves? Do they adopt the same habits and patterns of behavior as their master's?
Even though seeing pets dressed up in clothes, leather jackets, tutus, is cute some of the best photographs can be taken when the pet is oblivious to the camera-when you catch the animal's expression or when the animal has almost a human expression. Another approach to pet photography is to take a photo of your pet when he isn't looking. I suppose some animal activists may think this encroaches on the animal's privacy, but even such high profile pets like Barney, President Bush's dog, or Socks, the former White House cat have learned to live with their in-house photographer!
Tips for photographing reptiles, birds and other caged friends:
If your pet spends most of his life behind bars, it certainly makes sense to let him out for the photo shoot! Your Iguana will look much better lounging around the backyard than napping in a cage.
Snakes and other reptiles – If your significant other doesn't want to pose with this snake a la Natasha Kinski, there are plenty of other ways to photograph a snake. Be inventive! You can get a close up shot of the snake's face and eyes or put him on a table and photograph him from different angles. You can also experiment by placing your pet in an environment that is foreign to your pet. For example, you could place your pet frog on a satin pillow for a contrast in texture. Who knows? The frog might like it.
Birds – If you have trained Polly to rest on your finger then you shouldn't have a problem getting her to pose. Chances are your feathered creature is very colorful. Use this physical attribute to your best advantage. Make sure that your background does not clash with his colors. Make sure the background isn't too busy. Keep it simple; stick to solid crisp colors.
Fish – We did not want to leave out the goldfish groupies among you! If you want to take a good photo of your fish tank, follow these rules:
If you are not going to be using your flash, your best bet is to put your camera lens against the fish tank and wait for the fish to swim your way. The light from the aquarium will brighten your subject. If you are intent on using a flash, be sure to take the photo from an angle, a 60-degree angle is fine, so that you do not get a blinding hot spot.
Now that you know how to take great photos of your pampered pet, we wish you a good scratch-free photo session!
Black-and-white photography tips.
from the New York Institute of Photography
Before there was color photography, there was black-and-white photography. In today's world we've become accustomed to color photography – in magazines and newspapers, as well as lots and lots of color images on our favorite Web sites.
But for most of the history of photography the world was recorded in monochromatic tones – a photograph was a two-dimensional rendering of light and dark patches that created a black-and-white likeness of a real-world scene. Sometimes the dark portions were dark gray and black, other times dark brown and deep brown (sepia).
Today, given that we live in a full-color world, black-and-white photos can have a special significance.
Black-and-white is back because it's part of the power of photography.
If you look around, you'll notice that black-and-white is back in print advertising. In today's saturated-color manipulated-image world, black-and-white feels real. It has a sense of authenticity, even at times a gritty feeling. To many, it stands out in the sea of color and calls attention to the photograph.
Black-and-white is back because brides want to see black-and-white photos in their wedding albums.
The bottom line? Black-and-white photography is back because it's beautiful.
For Halloween photos, some ghosts and spooks will actually look more ghostly and more spooky if you photograph them in black-and-white, so we encourage you to try this technique as you take pictures for our exciting Picture Perfect Halloween Photo Contest.
In the old days, if you wanted a black-and-white photo, you had to start by purchasing black-and-white film. Today things are much easier, and you have two perfectly good options:
First, you can shoot directly in black-and-white. In almost all digital cameras (and many camera phones) somewhere in the menu you will find a selection that will cause the camera to record a black-and-white image, or even a sepia-and-white image. Remember, these are both monochromatic renderings that just use different tones. Both of them give a sense of "realism" to the image and sepia also adds a nostalgic feel.
Your second option is to take regular color images and then convert them to black-and-white, or sepia, or even blue-and-white or red-and-white (the latter might be great for devils and other active demons). Many professionals prefer this approach since it allows them to have both a color and black-and-white version of the same image. If you photograph a subject in black-and-white initially, it's hard to add color. Another reason for the pro's preference is that you have more control this way. It can also allow you to perform tricks like "spot color," where the overall image, let's say a vampire, is converted to black-and-white, except for the red blood-shot eyes and the trickle of red blood on the chin.
Both of these spooky still life photos are somber. The sepia-toned version loses the bright fall color of the maple leaf under the skull, but the sepia makes the photo look older and spookier.
Manipulating color images will depend on the type of camera you're using and the software you have available, so if you decide to capture in color and convert to black-and-white or spot color, you'll need to look for specific instructions about how to accomplish that with your equipment and image-editing software.
A good way to get a sense of how this might benefit your photos is to try it with some of the pictures you take for the contest and see!
|
||||||||||||||||||||||||
| Save with these treats! • Get 40 digital prints for only $4.99 - promo code: MONSTERFAN • Get 10 free greeting cards when you buy 30 - promo code: ZOMBIE • Get an 11" x 14" canvas print for only $15.99 - promo code: MUMMY
|
 |
$5.00 Treats - use promo code: SPOOKTACULAR $5 off all mugs: Magic mugs, Peanuts® mugs, colorful mugs, stainless steel travel mug. Whatever mug will bring a smile to your mug or the mug of the person receiving this great gift! Order a bunch now for holiday presents. Everyone will love these personalized mugs. $5 off a set of three 3x4 magnets: What an attractive offer! Make your refrigerator the coolest one in town.
|
||||||||||||||||||||||
|
||||||||||||||||||||||||